
If your business is creating any sort of short-form video content for Instagram Reels, YouTube Shorts, or Tik Tok it's important to add captions and subtitles to your videos. Having captions on your videos increases the engagement of your videos and helps your videos be shown to more people.
We'll show you how to use Adobe Premiere Pro to automatically create trending captions and subtitles. Even if you are a complete novice at video editing you'll be able to follow this tutorial. Watch our above video or read our six step guide below.
1. Automatic Transcription
Before generating captions you'll need to transcribe your video. Adobe Premiere Pro has a built-in transcription service that is free! I've found it to be very accurate if you have good clean audio. Once your edit is complete navigate to the text panel and click on the transcript tab. In the center of the window click on create transcription. If you do not see the text tab you'll find it in the window tab in the menu bar.
Adobe will generate a transcript in the background while you work. Once complete you'll see the transcript of your video in that same window. It's important to check over your transcription as Adobe will not get it perfect every time. Most often I find it incorrectly ends and starts sentences. Simply click on the text and edit it like you would in any other text editor.
2. Generate Captions
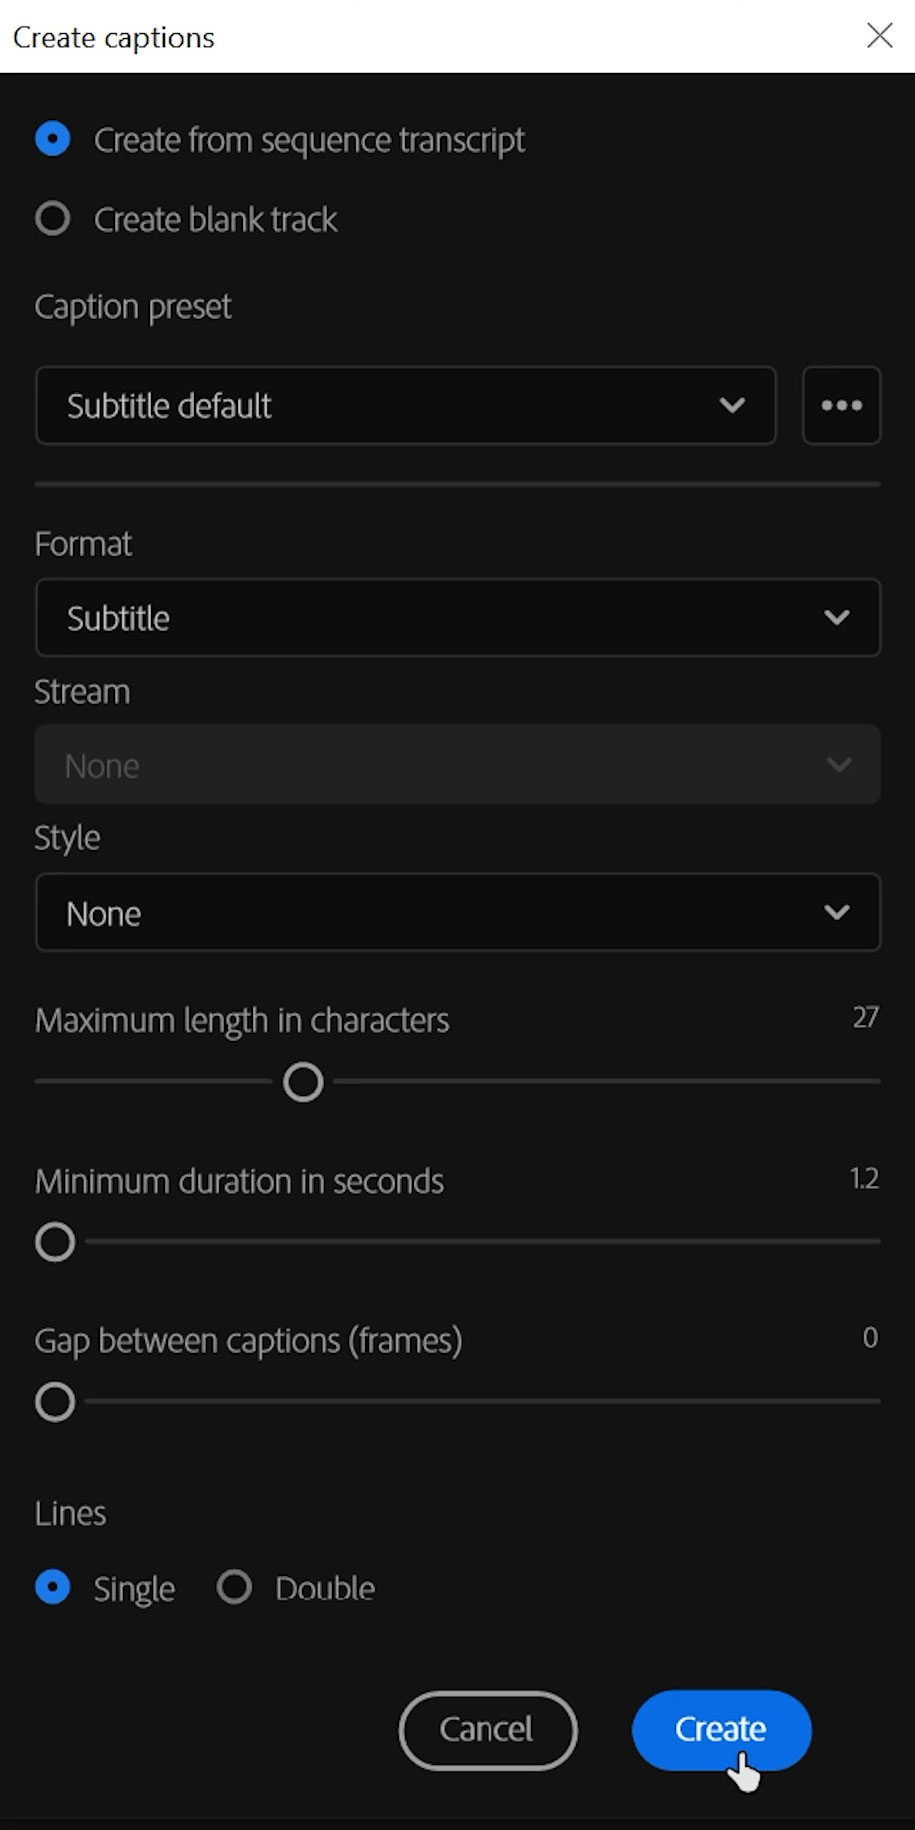
Once your transcript is complete we can generate captions. Click on the CC icon in the transcript tab. You'll be prompted with a window where you will need to adjust a few settings.

For fast paced captions like you see on Tik Tok, Instagram Reels and YouTube shorts you'll want to set the settings to the following. A maximum character length between 20-27, the minimum duration in seconds as low as it will go, and a 0 frame gap between captions. Also set the lines to single.
3. Style Captions
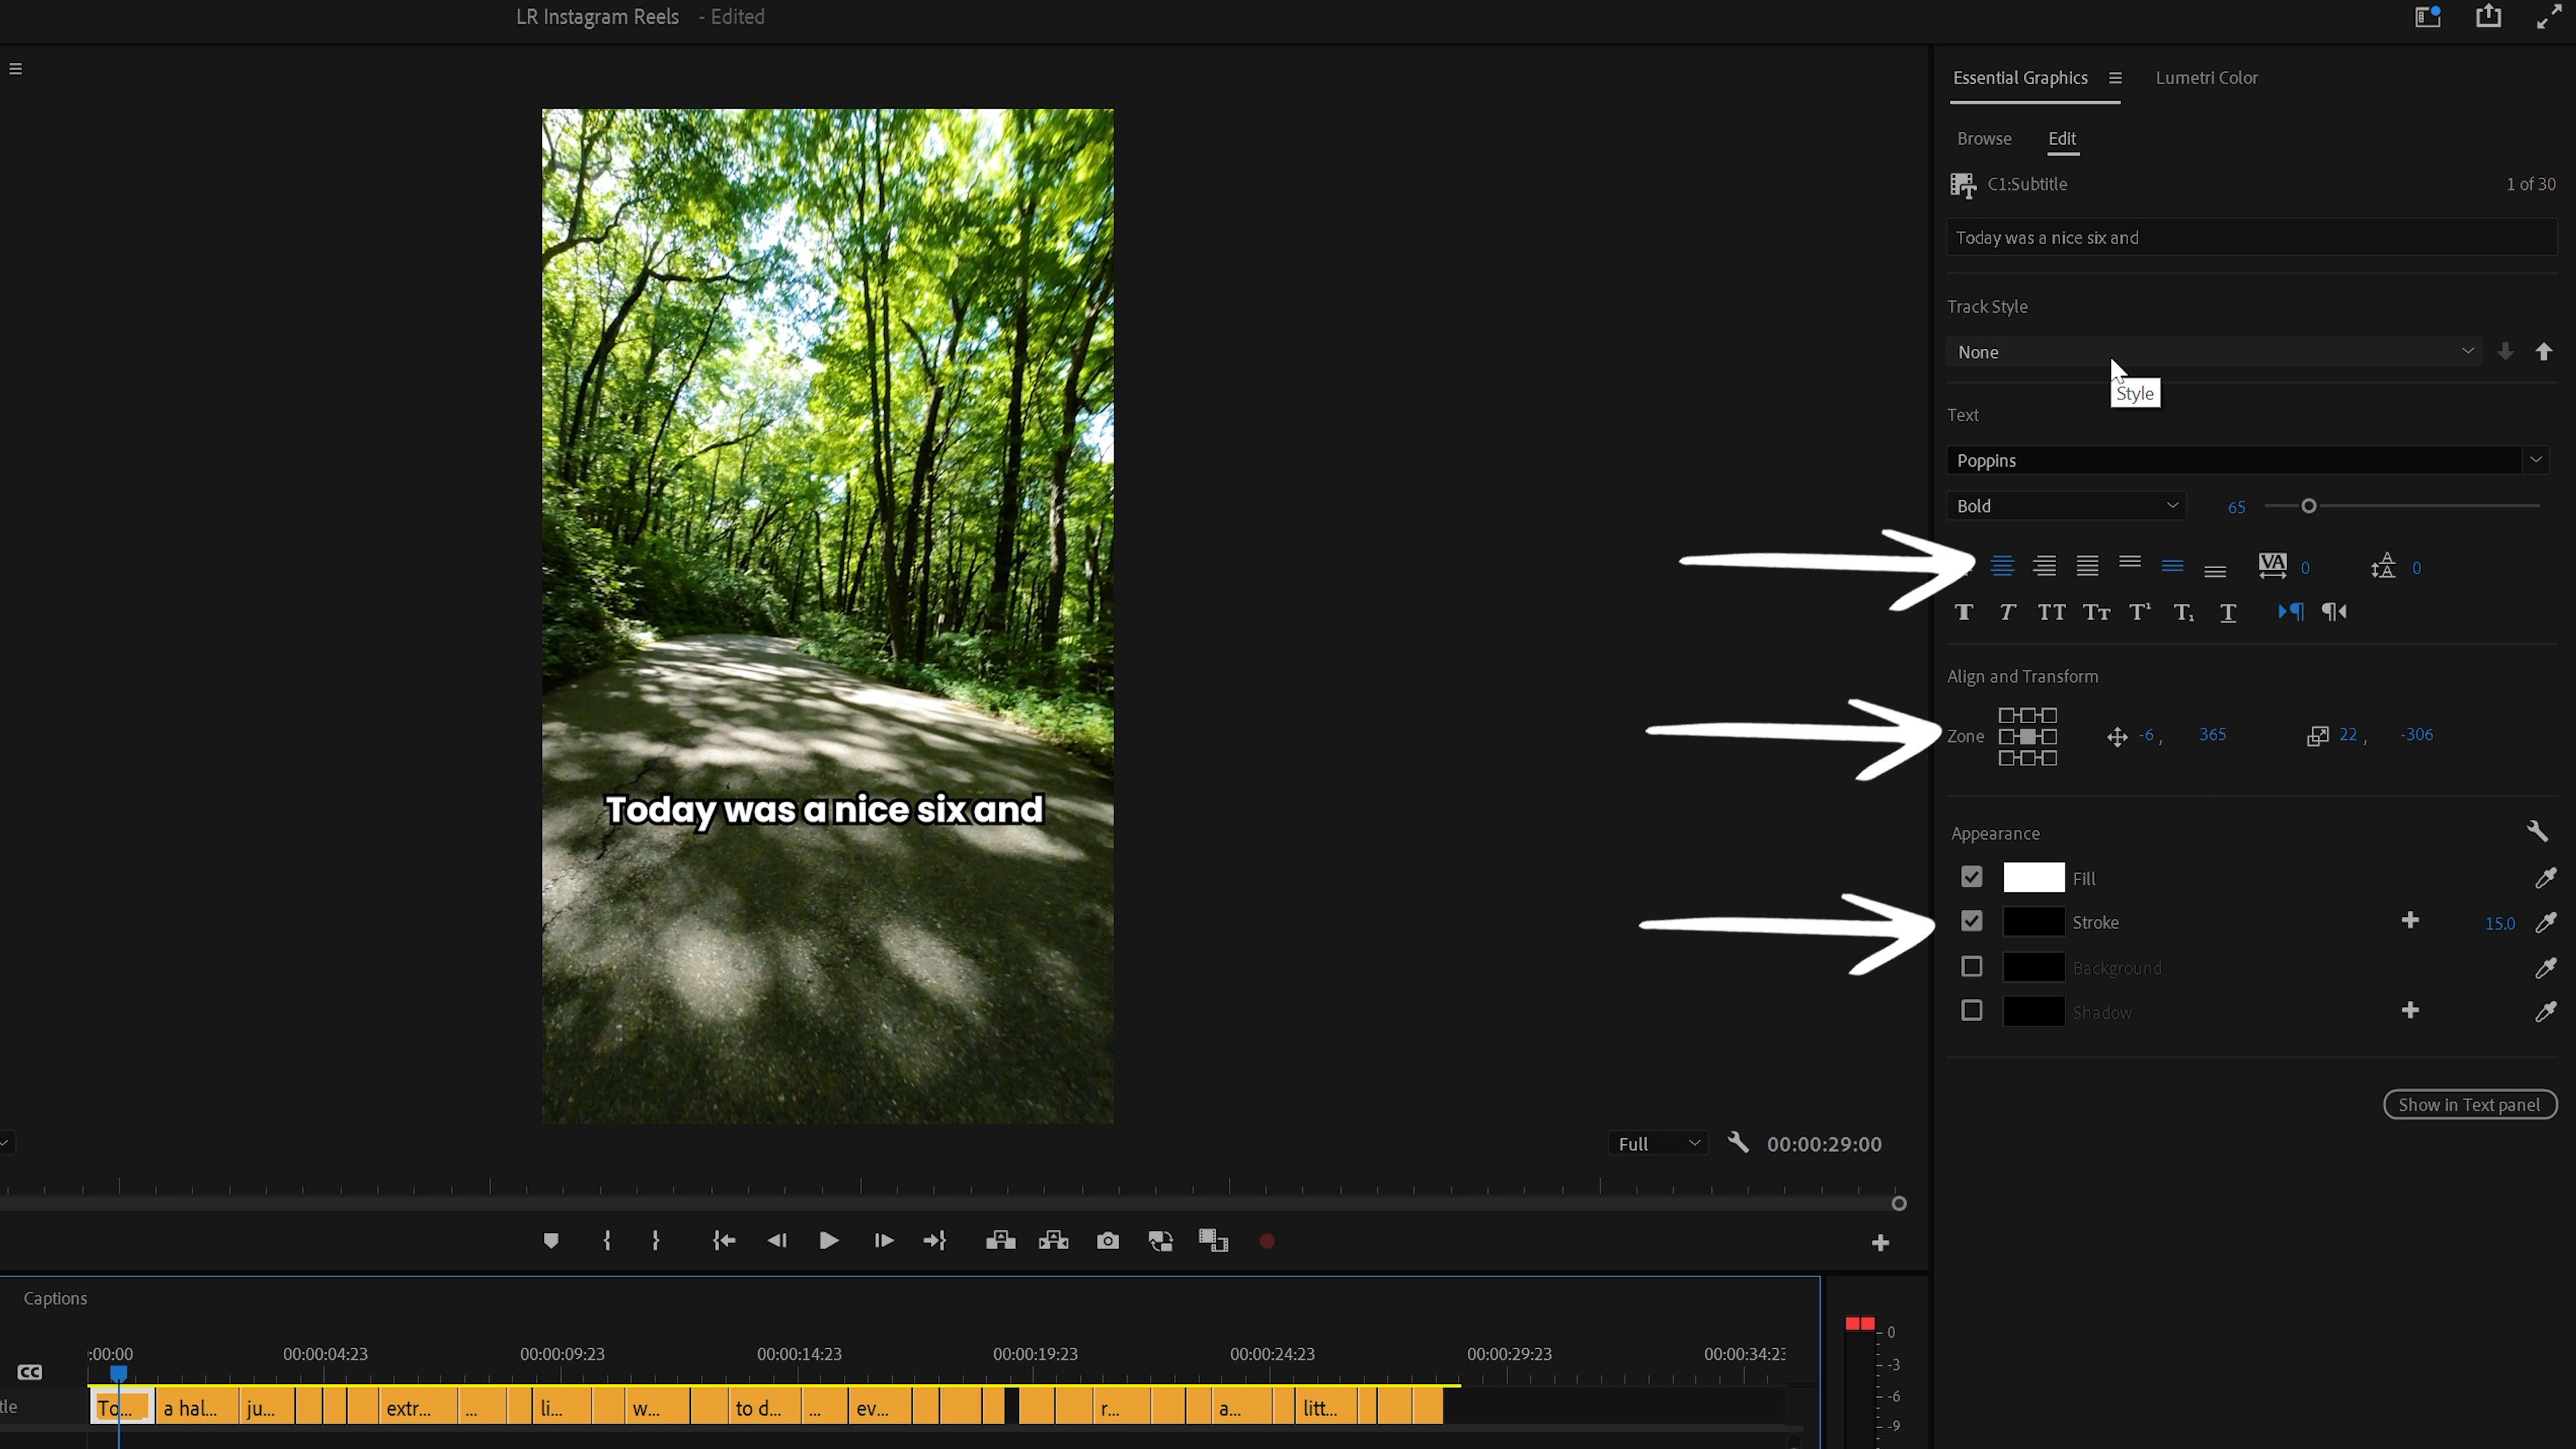
Your captions will appear above all your video tracks in the timeline. To style them simply click on one or multiple captions and then navigate over to the essential graphics panel. If you do not see the essential graphics panel you'll find it in the window tab in the main menu bar.
Choose a font that is bold and sans serif. I like using Poppins, Futura, or Gotham. You'll want to center align the text and make sure it is centered inside the box. Increase the size of the font so it fills the size of the text box. Adding a thick 15 point stroke helps your text stand out on any background. I usually choose black for the stroke and white for the text. We will add color later.
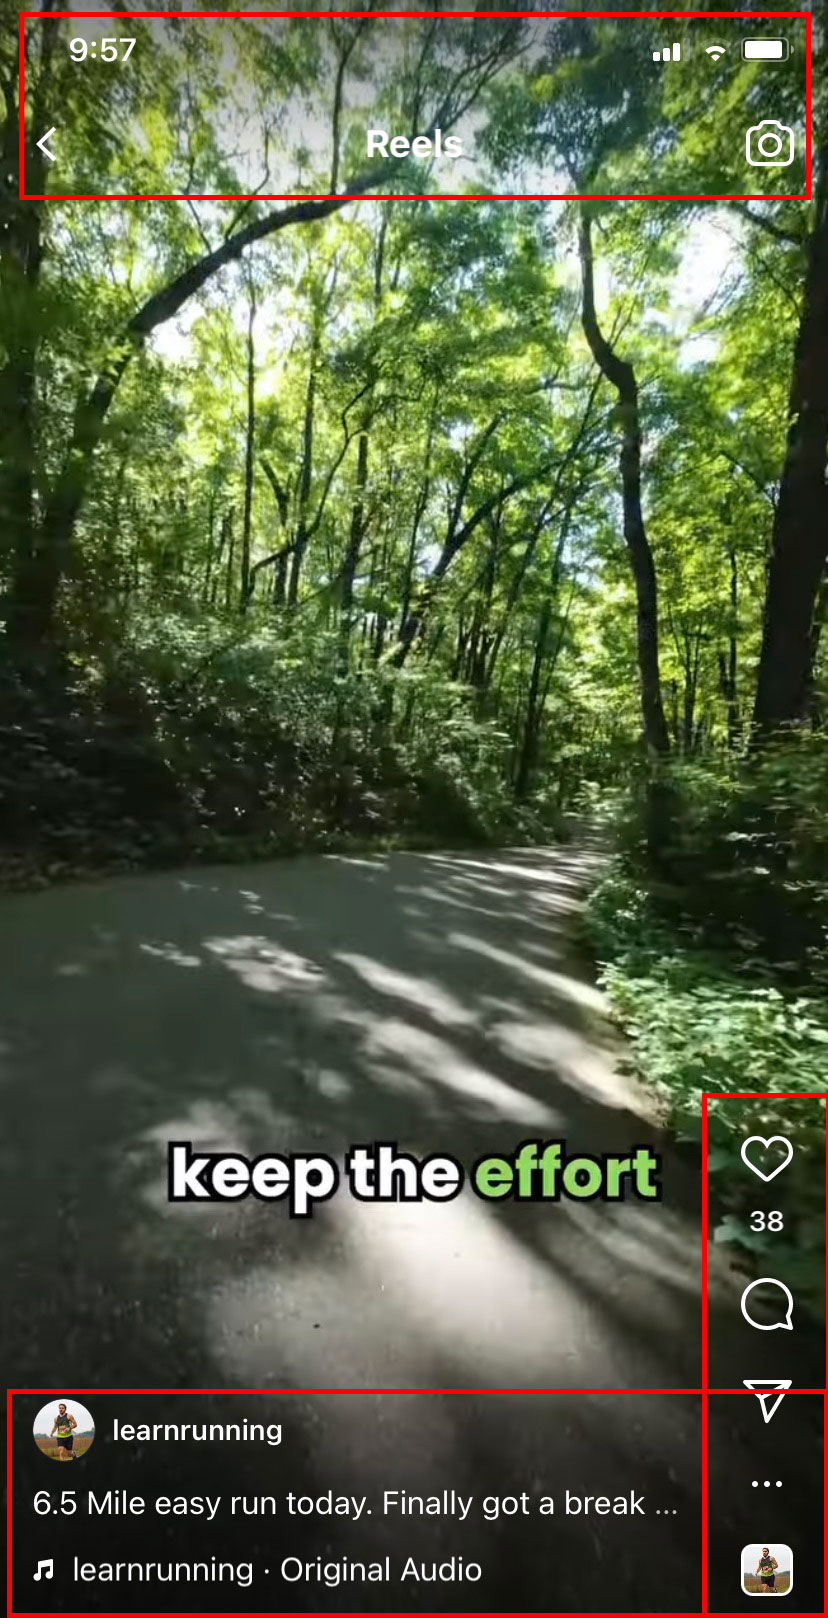
When positioning the text in the frame you'll want to avoid the edges and bottom of the frame. When this content is viewed on a modern phone it crops in a bit more since the phone is so narrow. In addition, you have the UI elements on the side and bottom so you'll want to make sure your text is free of that area. See the below screenshot of areas to avoid.
4. Create Preset For Captions
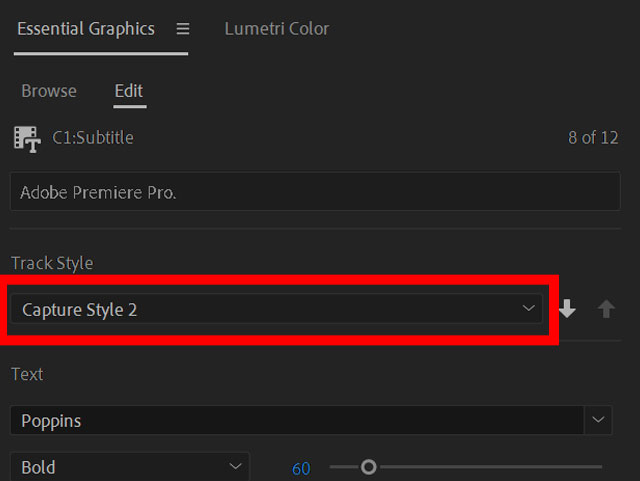
Once you are happy with the text position and styling we can save this as a preset for future videos. Leave the text white and black here so that the base style is easily editable when you need to edit it.
In the essential graphics tab click track style and click create preset. You'll be able to export this to use in other projects if you'd like. You can also make changes to your preset later and apply it by clicking on the arrow button on the right side.
5. Add Color For Emphasis
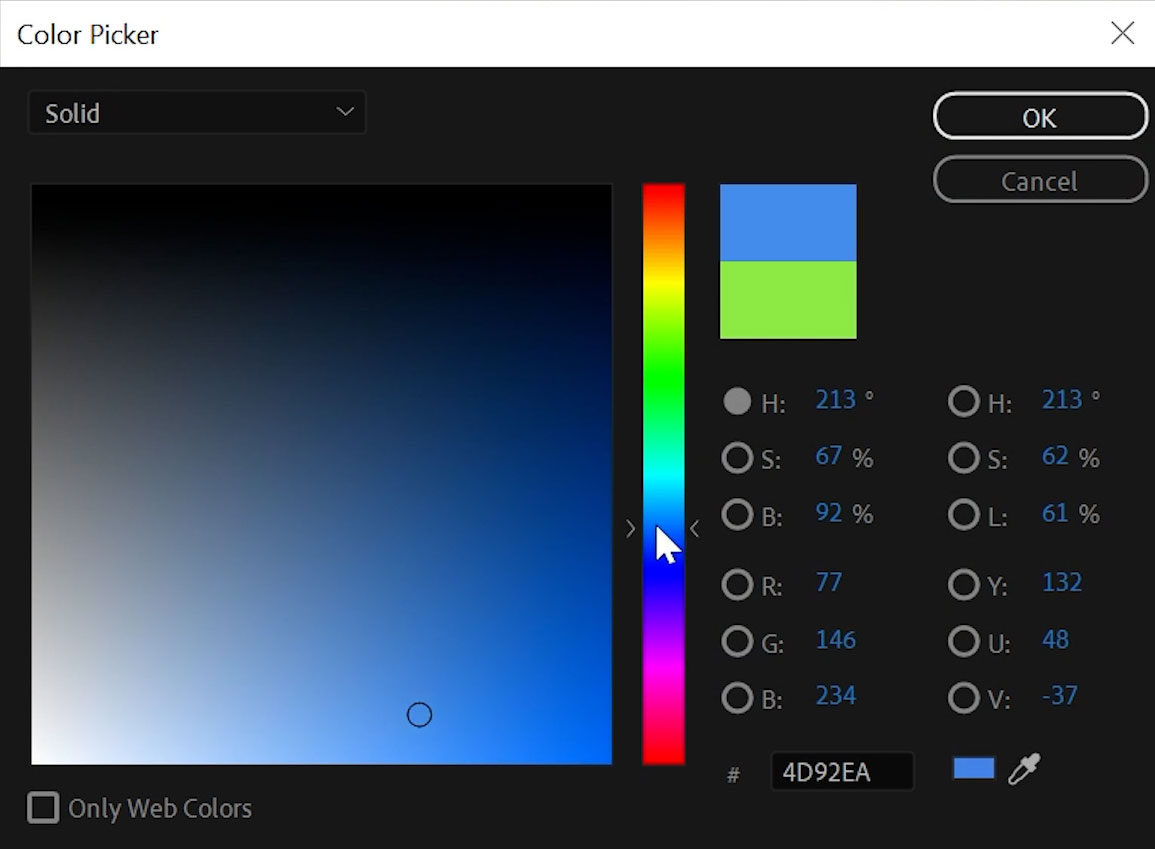
Now that we have a preset created we can go in and add color to certain words. Choose a keyword in each section or a word that is most important to the viewer to remember. Use the text tool and then highlight the portion of the text you would like to change. Go to the fill settings and then select a color from the color picker. Trending styles usually use a light blue, yellow, or green.

6. Export Video with Captions
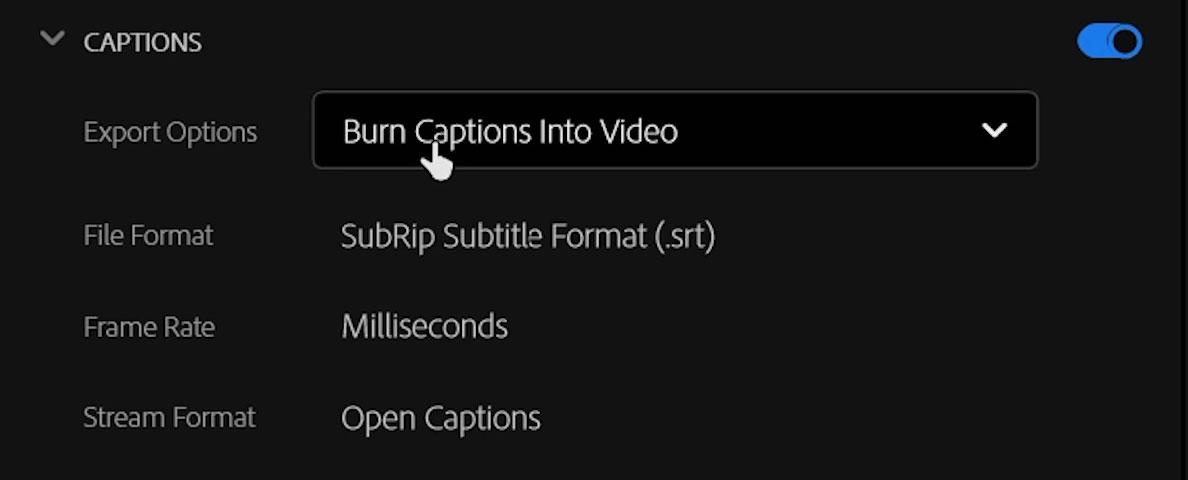
After you add color to all the captions and adjust any timings you'll need to click on one setting to properly export the captions. In the export options make sure "burn captions into video" is selected. Once exported you should see your finished video with trending captions!
Try Adding Emojis, Animations, and Graphics.
Want to take your captions one step further? Think about adding emojis, graphics, and animations to create even more engagement of your content. Anything you can do to make your content stand out will increase the return on investment of your marketing videos. Take a look below at an example we created for a client of ours using trending caption styles.

