
A lot of our clients use screen recordings in their marketing videos. When creating software overview videos or product demos it's important that you capture the screen in the highest quality you can. This enables you to zoom in when editing the video. While there are a lot of free programs online, most of them watermark your footage or place a limit on your recording length. In this article we'll show you our free process for getting high-quality screen recordings on PC and MAC.
How To Record Your Screen and Voice Using OBS Studio
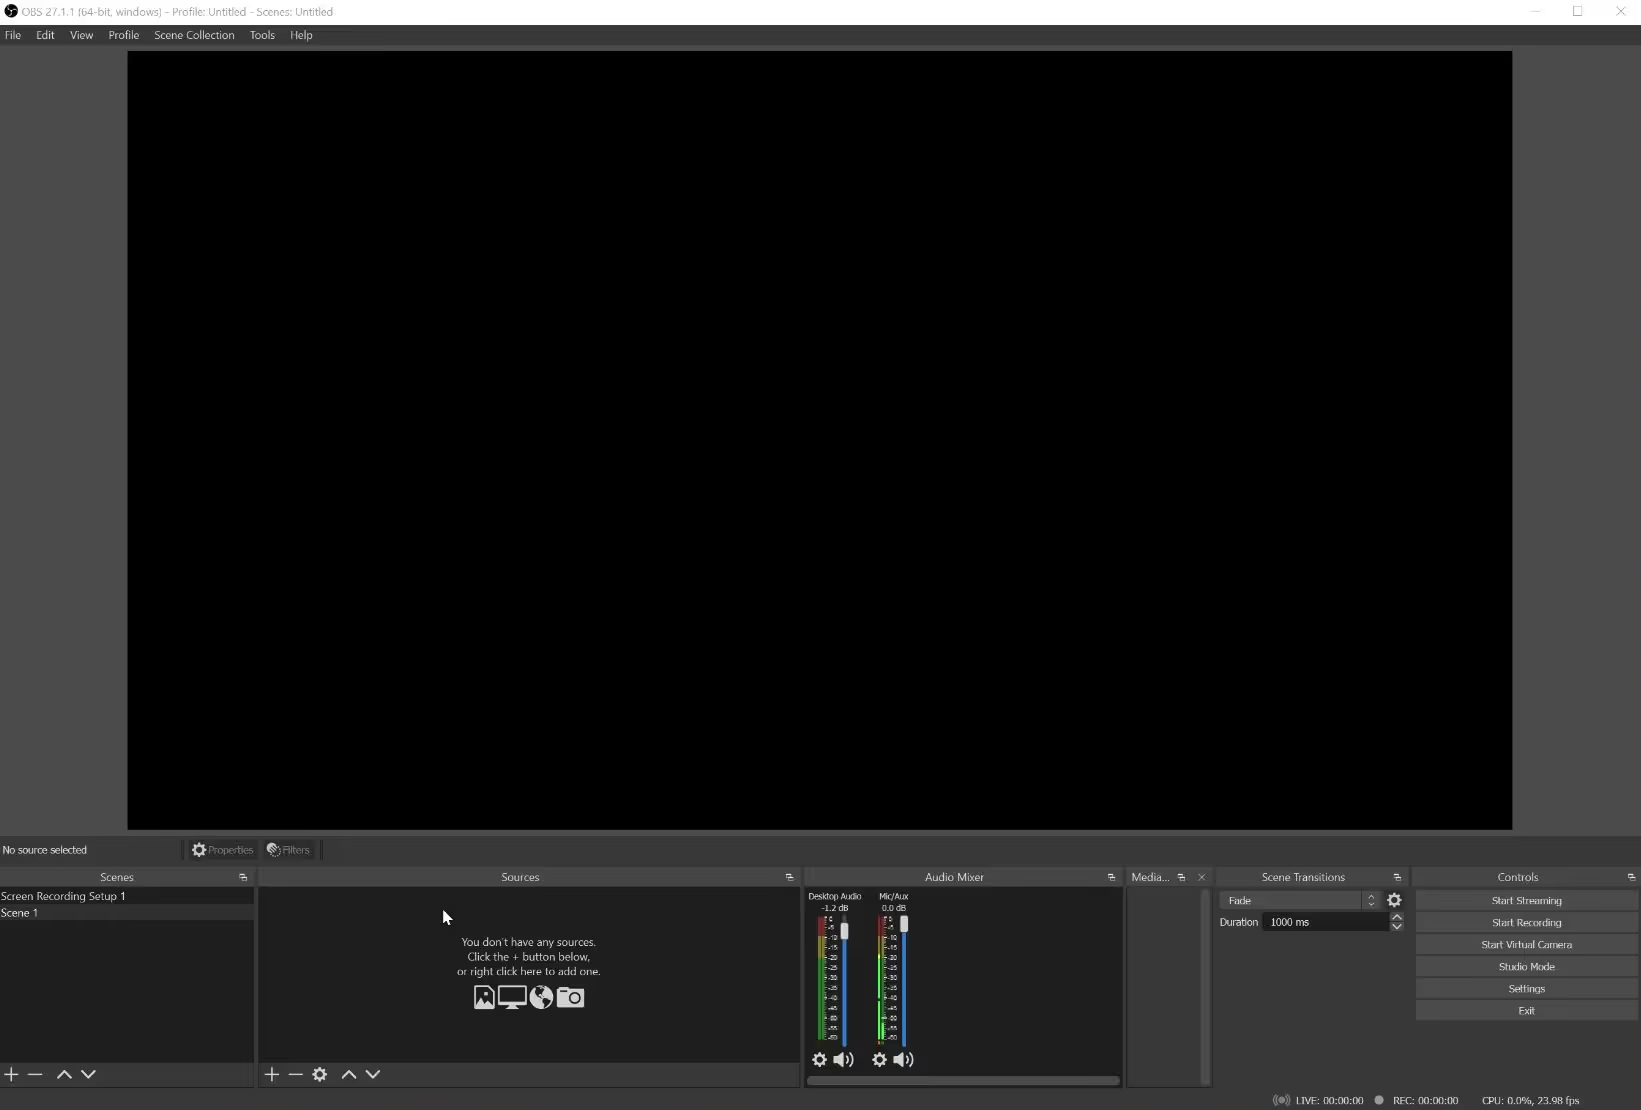
We'll be using a free, open-source program called OBS Studio. You can download it here. While OBS studio is primarily designed for streaming, it has a fantastic built-in screen recorder that is really easy to use once you set it up. Another great feature is that you can setup recording of your microphone and desktop audio. If you prefer to watch a video on this instead of read, check out the video at the top of the page or watch it on our YouTube channel.
1. Setup Display Capture Source
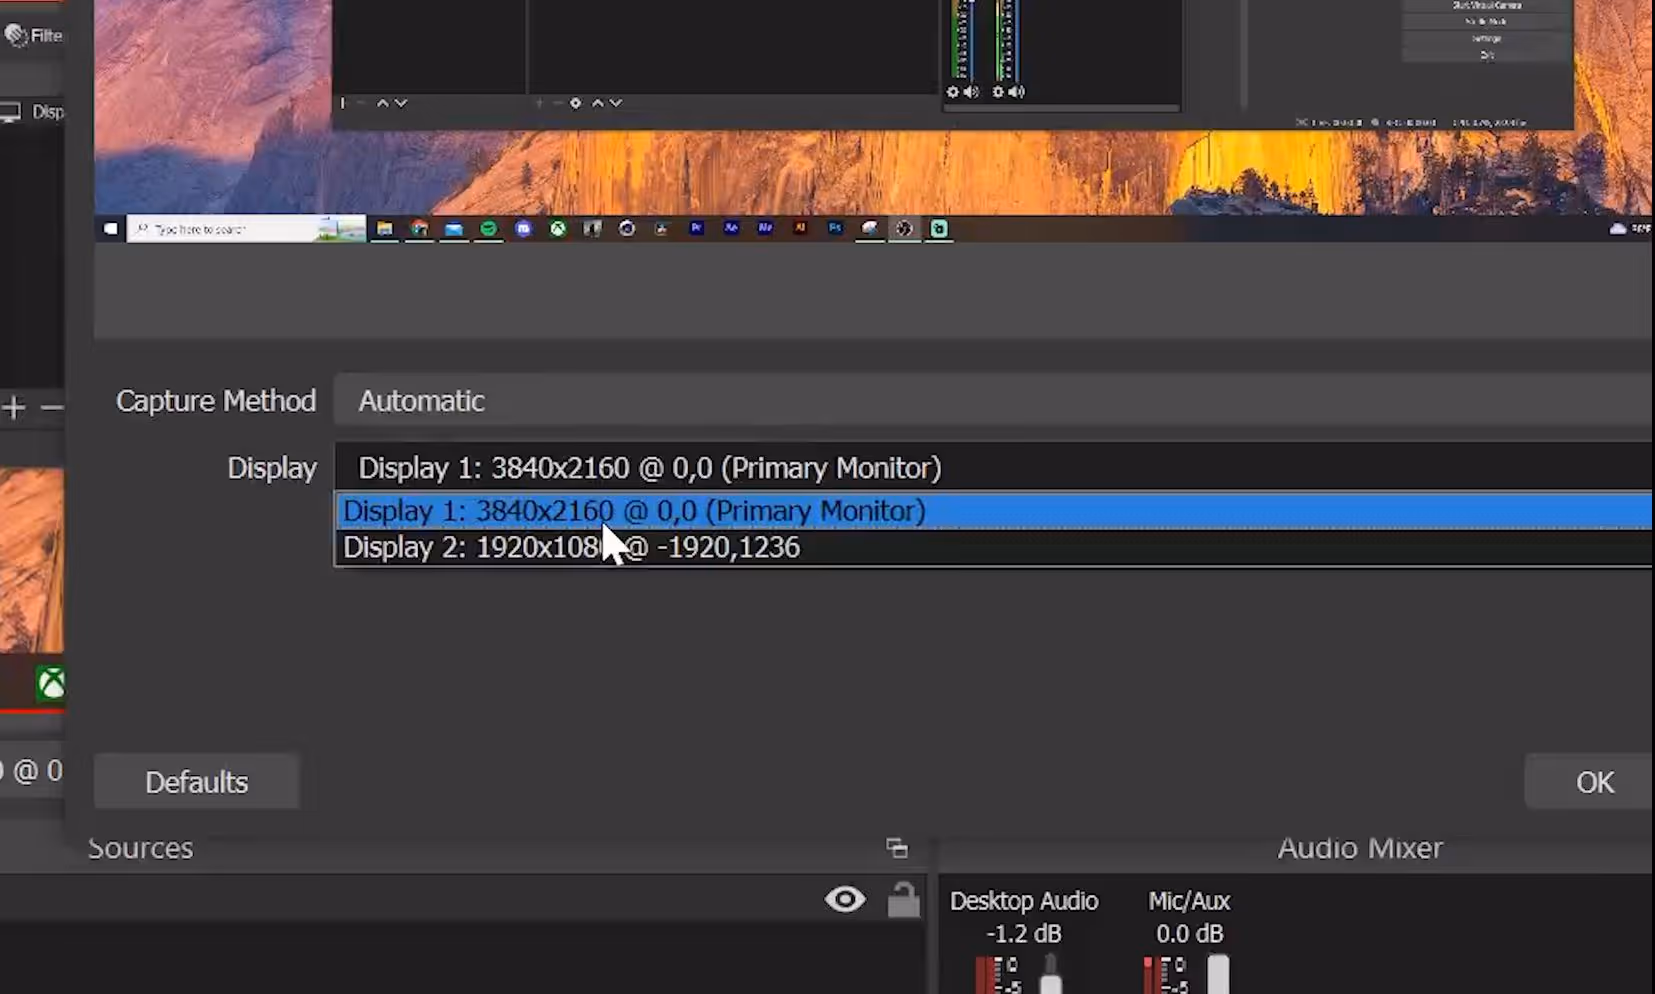
You'll first need to setup your display as a source. Find the plus button near the source window and select 'display capture.' In the next window find the display you'd like recorded. We recommend using the highest resolution display you have access to. If you're able to record in 4k this will significantly improve the quality of your screen recording.

2. Setup Audio Capture Sources
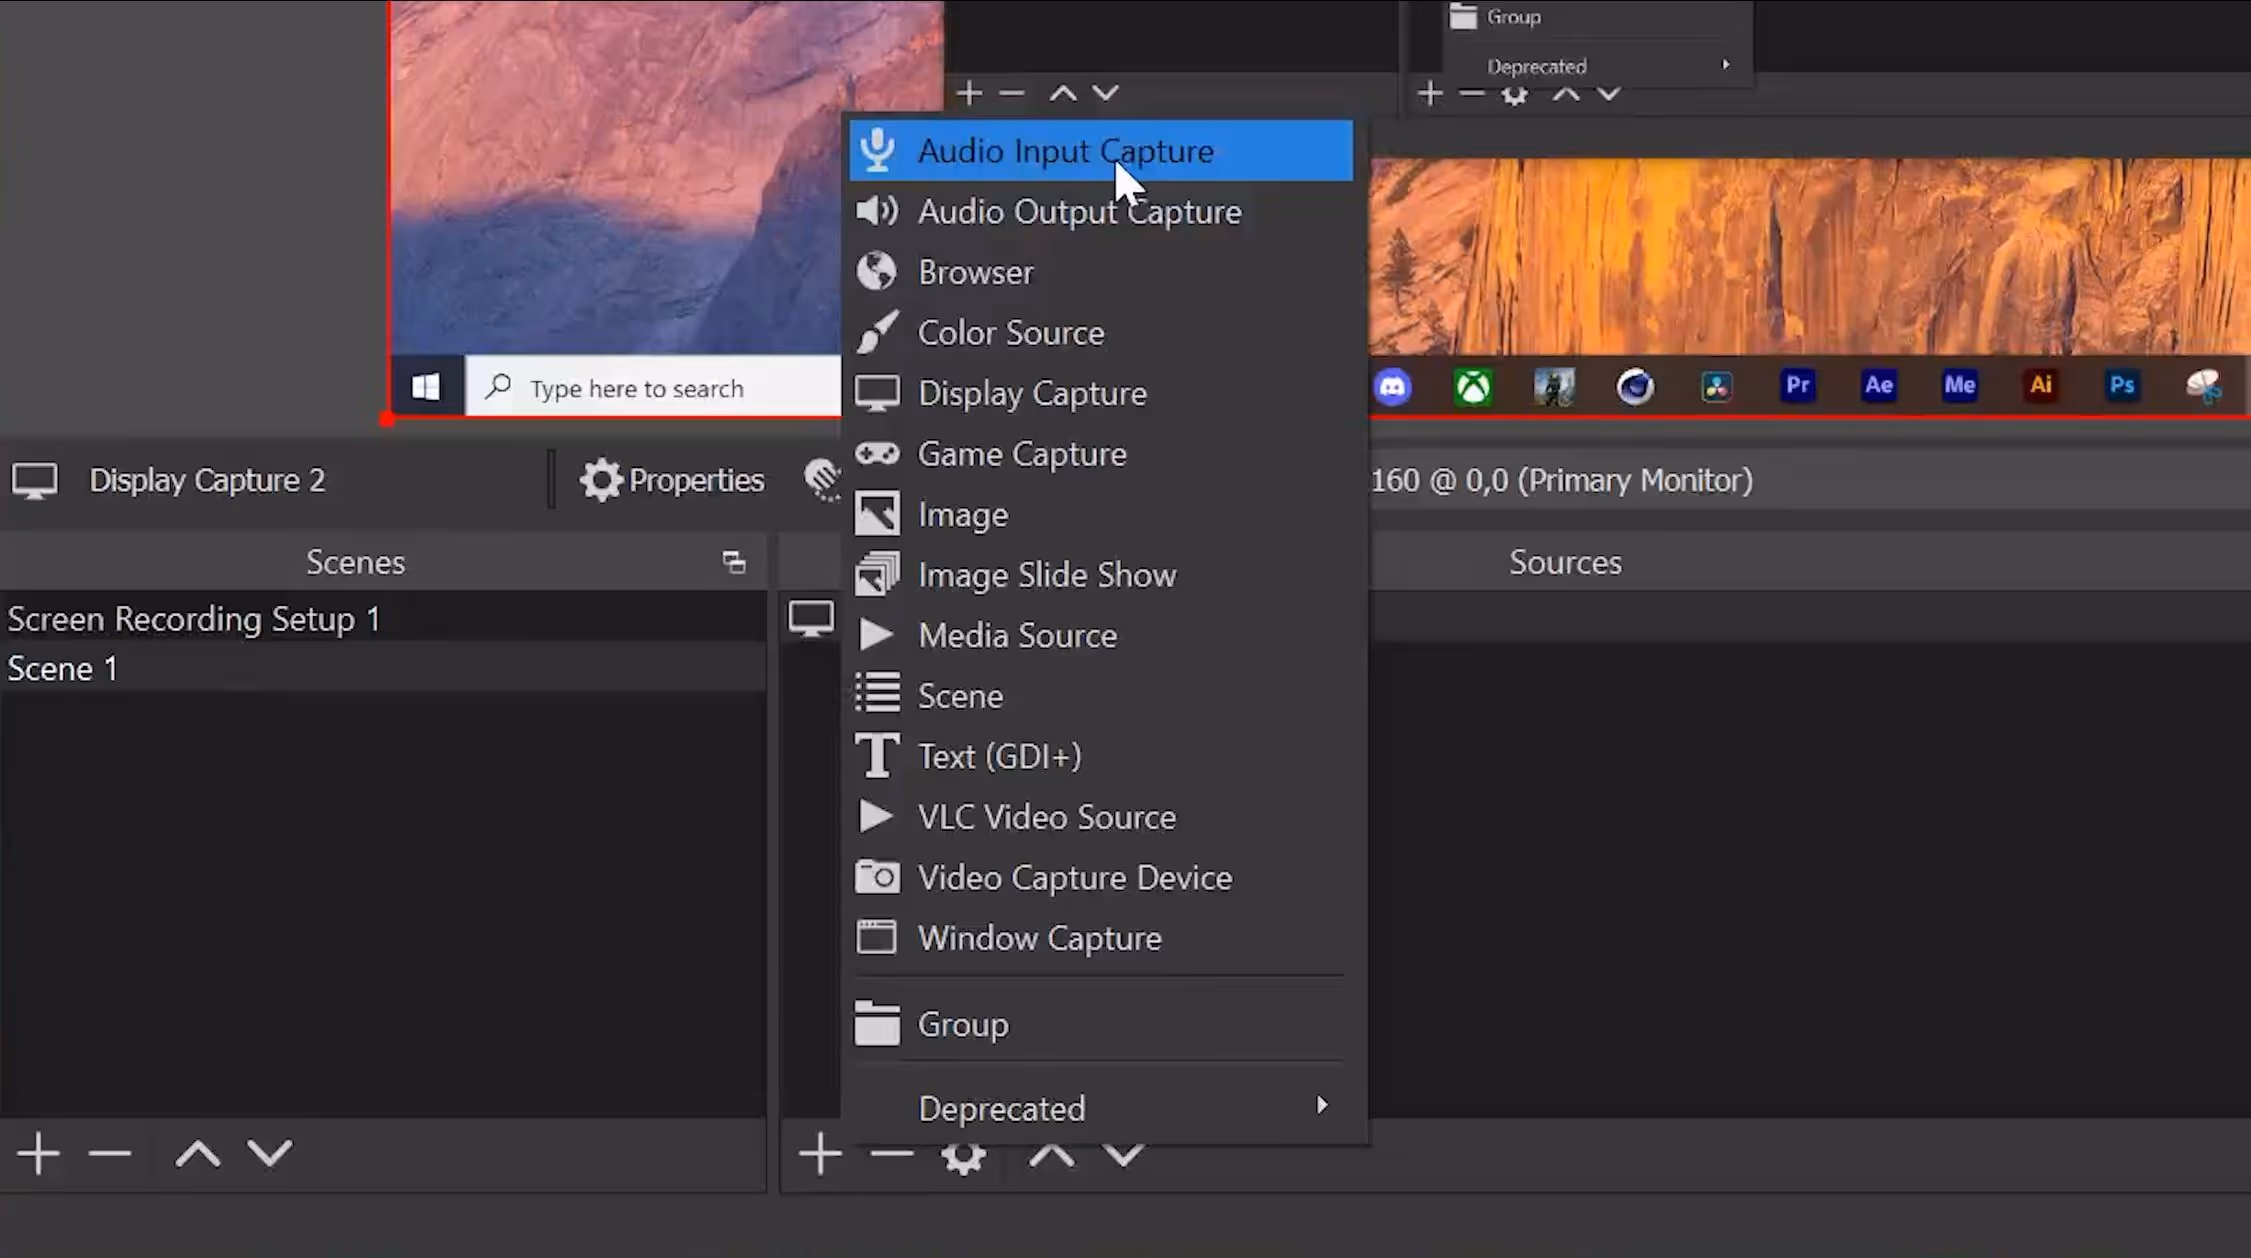
Skip this step if you don't need to record audio. First, right-click and select hide on any audio sources that you may see in your mixer. These are there by default and will not get recorded, so I recommend hiding them. Now we can add our audio sources.

Record Your Microphone
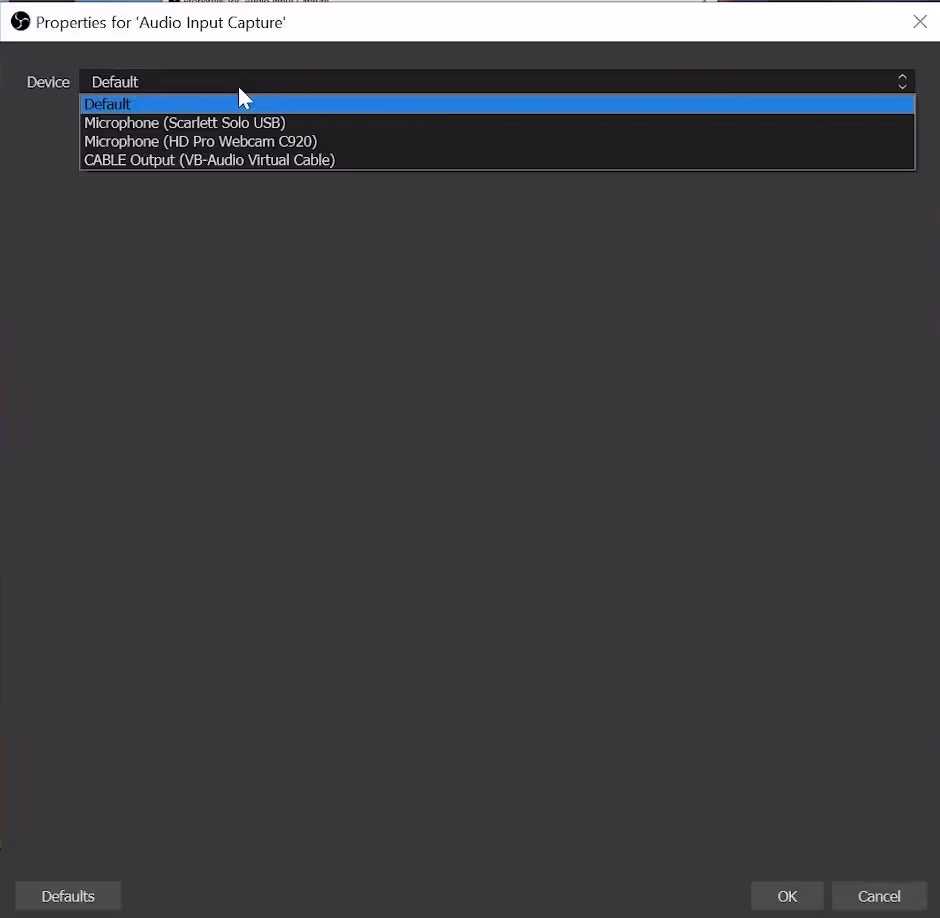
Select 'audio input capture' to record any USB, internal or webcam microphone. Name your audio source and then find your microphone in the next window.
Record Your Desktop Audio
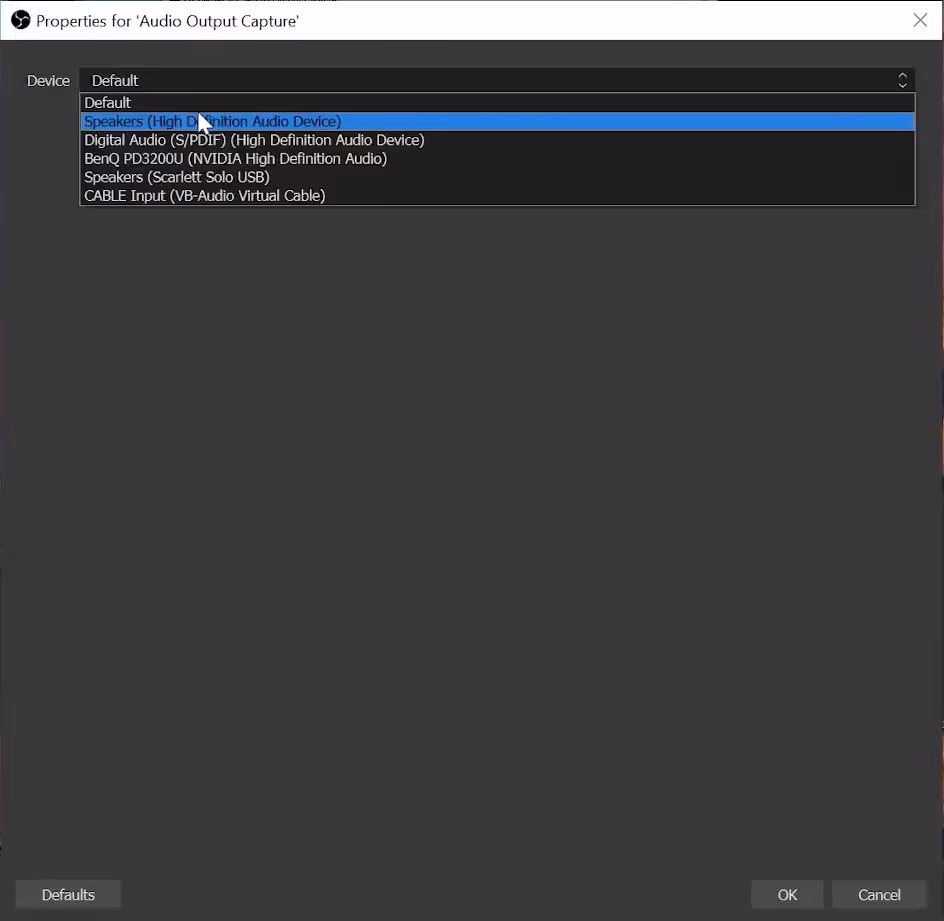
Select 'audio output capture' to record any audio being played on your computer. Select your headphones or speakers in the next window.

Select Audio Tracks
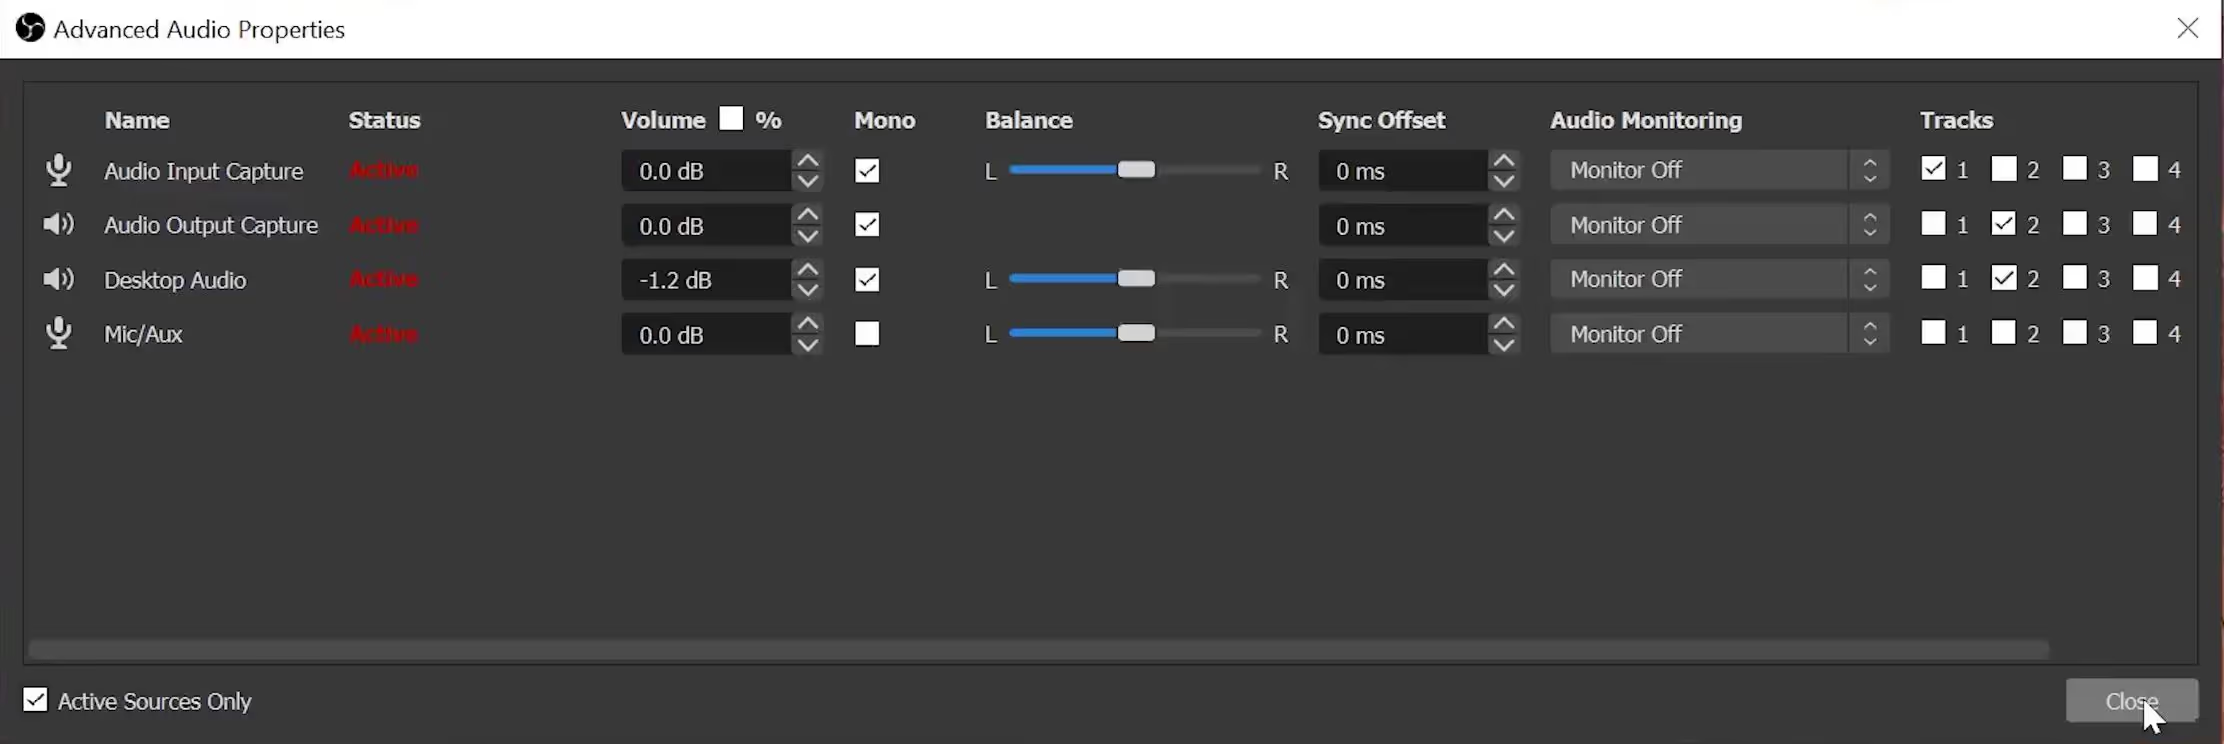
If you are recording one or more audio tracks it's important to specify what track they will record to. To change this right-click on the audio mixer and click on 'advanced audio settings.' Now find the two audio sources you just created and put one of them on track 1 and the other on track 2. Select mono for both of these audio sources.
3. Adjust Settings
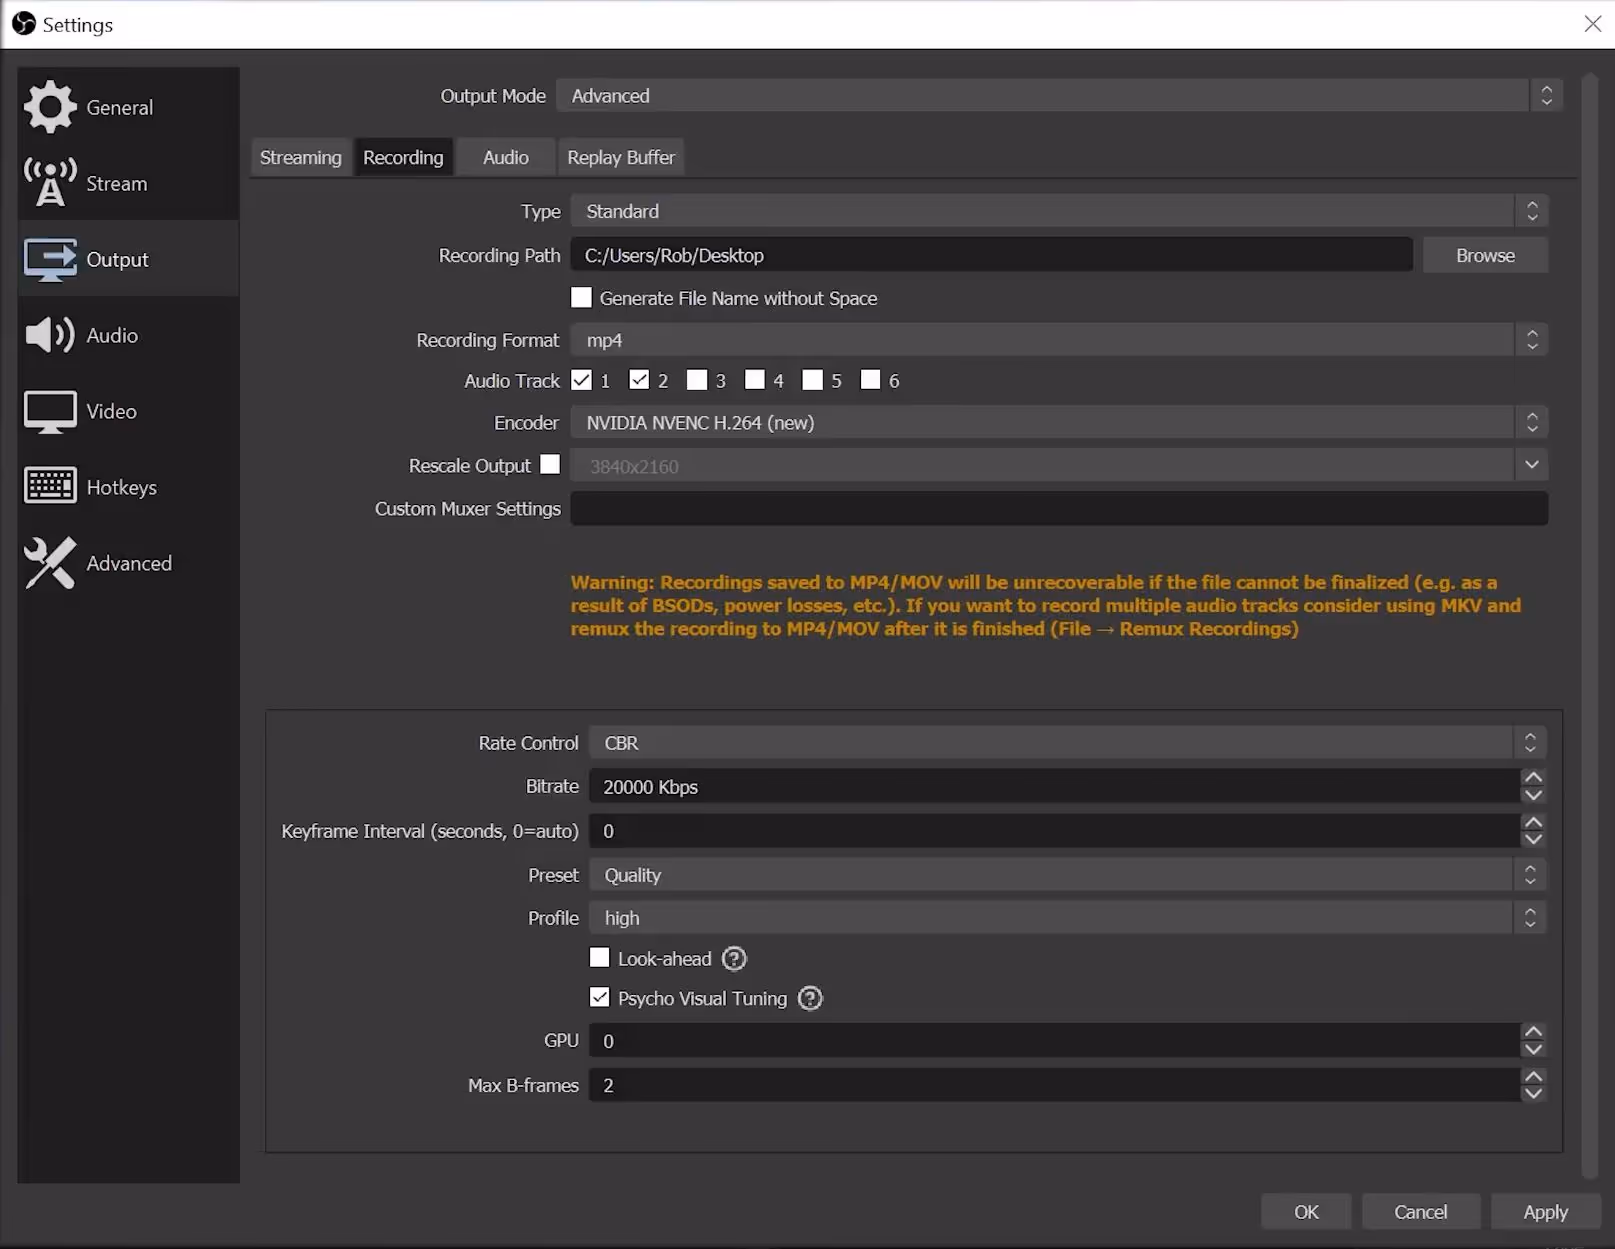
Now that we have all of our sources set up we need to adjust some settings. Click on 'settings' in the bottom right and find the output tab. At the top make sure you are in the advanced mode. In the recording tab you'll be able to indicate where your recording saves to and also specify the quality of the recording. Select MP4 and enable the first two audio tracks for recording. For the encoder you can use the NVIDIA one. Below, set the rate control to 'CBR.' For the bit rate we'd recommend at least 10,000 kbps. Typically we use 20,000 kbps. Additionally, set the preset to quality or max quality.
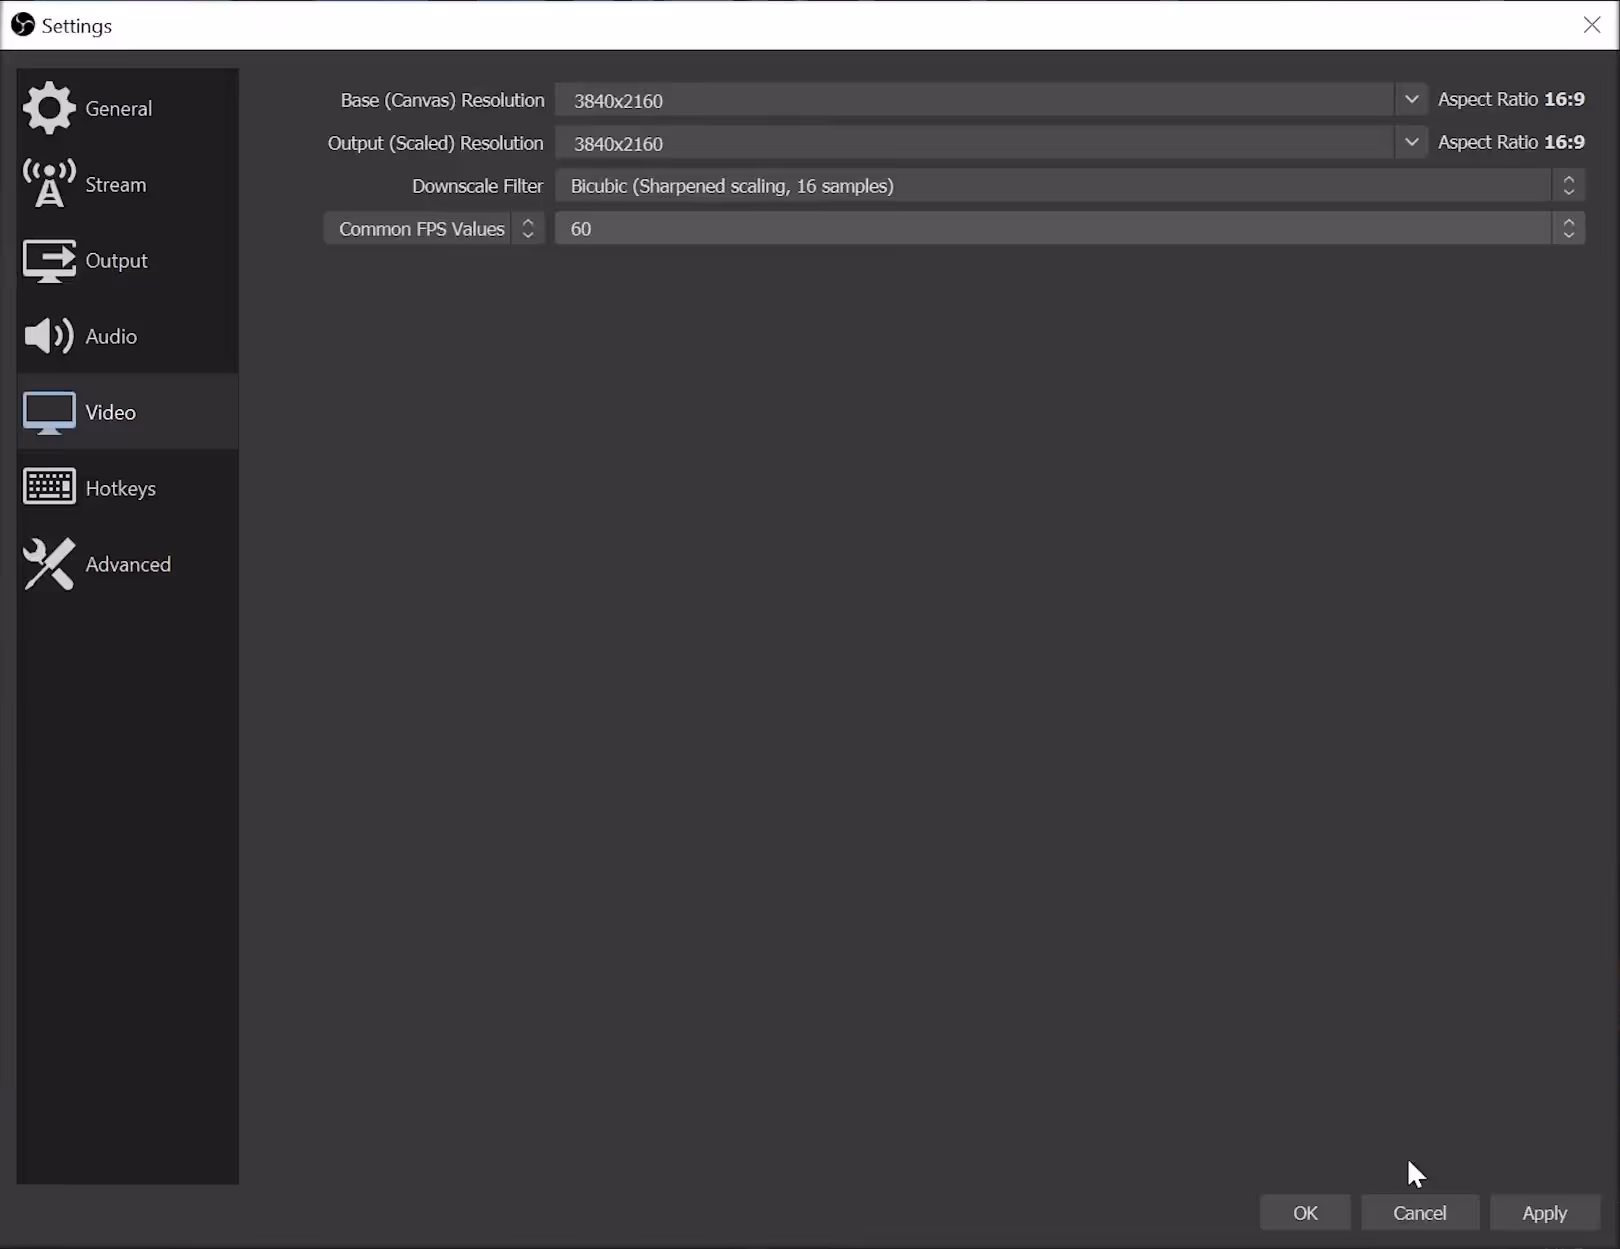
In the video tab you'll find a few more settings. Ensure that your canvas and base resolution is set to the size of your screen. Additional select your frames per second. 60FPS if you want the highest quality.
4. Start Recording
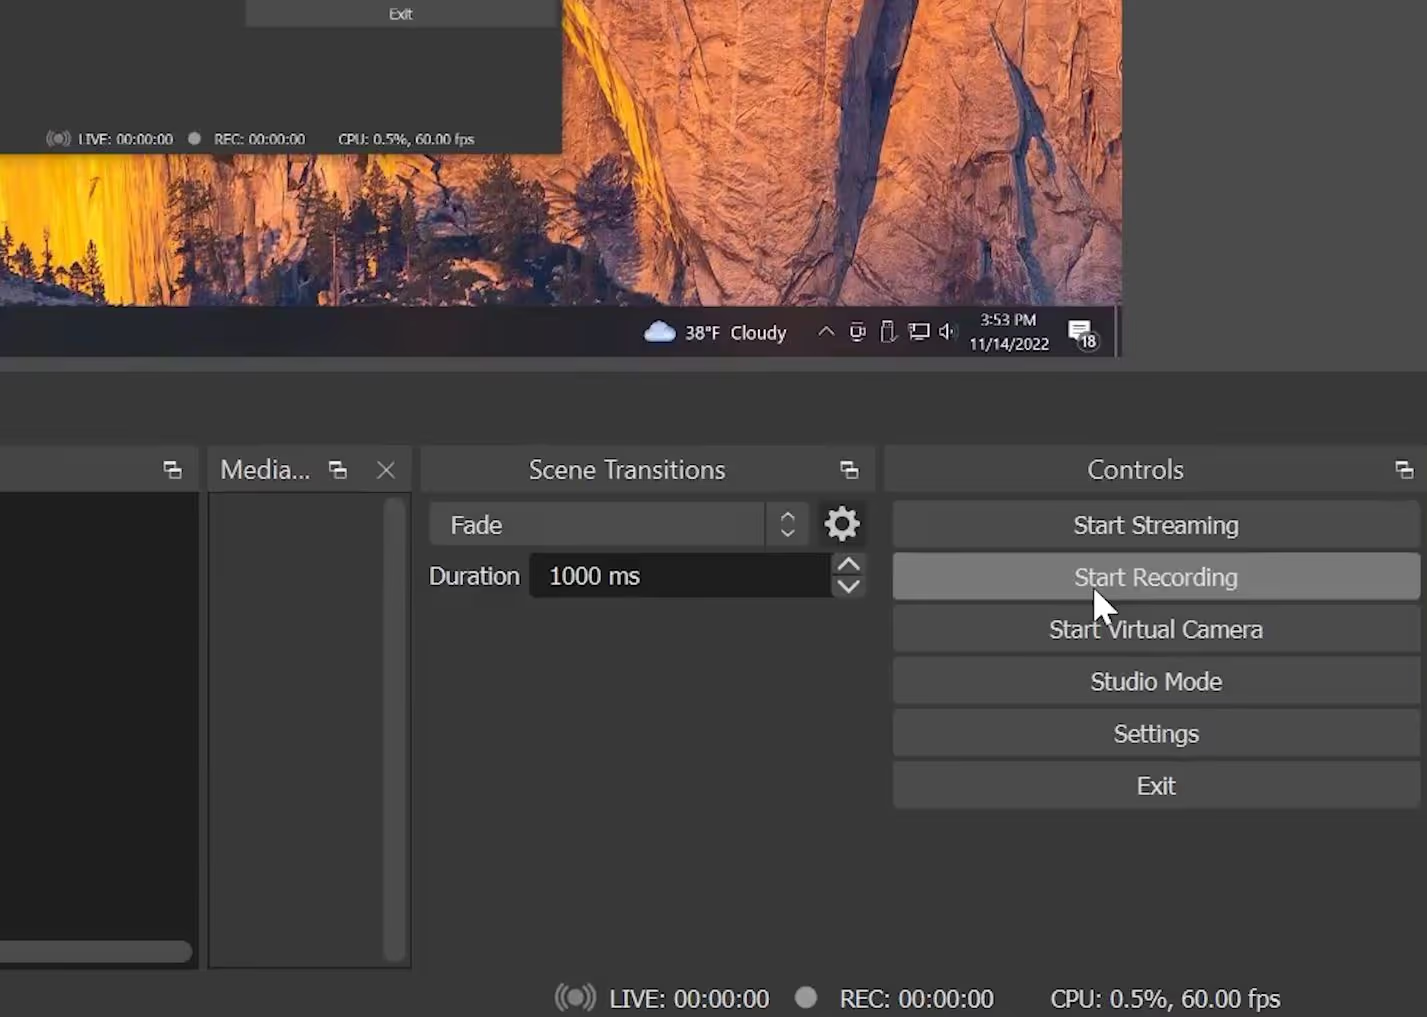
Once you apply your settings you are all setup for recording. In the bottom right of the OBS window you'll see a button that says start recording. Click on that and begin capturing your screen. When you are done click on 'stop recording.' You'll find your file where you told OBS to save it. Note that you are able to setup a hotkey for start/stop recording in the settings panel. This will enable you to begin recording whenever OBS is open but not active.
Tips For Better Screen Recordings
There are a few additional things we like to do when recording our screen. This ensures that your video is easy to understand and is not cluttered with unnecessary information.
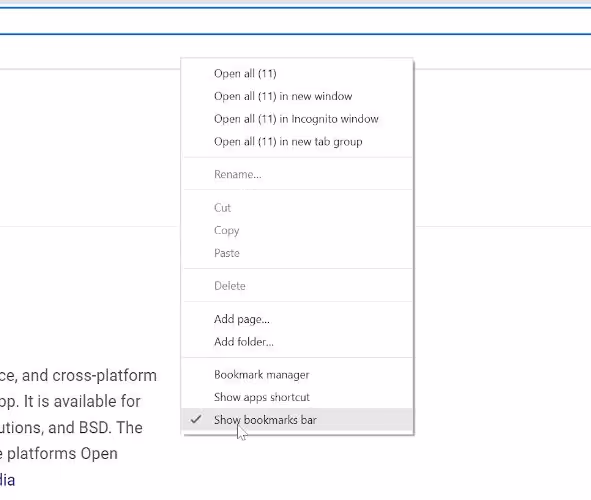
- Close all bookmarks and extra tabs or windows.
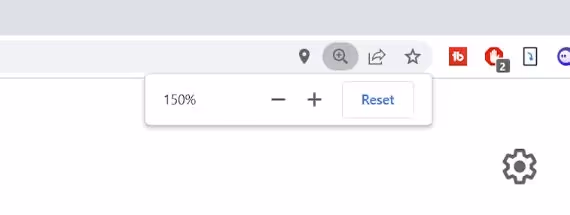
- If using a web browser, zoom in to make the page bigger.
- Increase the size of your mouse cursor.
- Use a 4k screen.
Examples Of Screen Recording Videos
We create a lot of videos for our clients using screen recordings. Sometimes we even rebuild parts of their user interface and add animation to add more interest to the video. Contact us today if your business is needed of software overview or product videos.

